

There’s something truly special about adding a handcrafted touch to your garden or home decor. Creating your own DIY rustic wood flower box not only lets you showcase beautiful blooms but also brings a warm, charming accent to your living space.
In this guide, I’ll walk you through the simple steps to craft a DIY rustic wood flower box. It’s an accessible project, even if you’re new to woodworking, and a wonderful way to express your creativity while complementing your existing decor. Let’s explore how you can bring a bit of countryside charm right to your doorstep with this delightful addition.
Materials
- Wooden box
- Oasis foam block
- Pliers
- Scissors
- Box cutter
- Chalk marker
- Silk flowers: ranunculus (white), david austin rose (coral), peony (blush), hydrangea (white), Stachys byzantine
- Berries and greens

1. Paint the Word of Your Liking
Before you start putting the flower composition together, take the chalk marker and paint the word “love” (or any other word of your liking) on the side of the box. It’s not necessary to let it dry, so you can move on to the next step right away.

2. Fit the Foam into the Wood Box
First, you will have to cut the foam to fit into the wood box (our box is 7”×7”). Place the blocks into the box. You may want to start with the largest one and then fill the remaining space with the two smaller ones.

3. Group the Flowers
Now come the flowers. First group them based on their size and colour. Start with the larger ones and finish with the smallest. The numbers in the picture indicate the correct order. (You should cut the stem of the flowers to match the height of the wood box with the pliers.)

4. Place the Flowers into the Foam
Place the flower with the largest head into the foam diagonally. After that, put two white flowers next to the peach-coloured one. Next place two of the coral-coloured flower (Nr. 3 in the picture) around the larger ones, then fill the remaining space with the flowers marked Nr 2 and 3 in the picture.
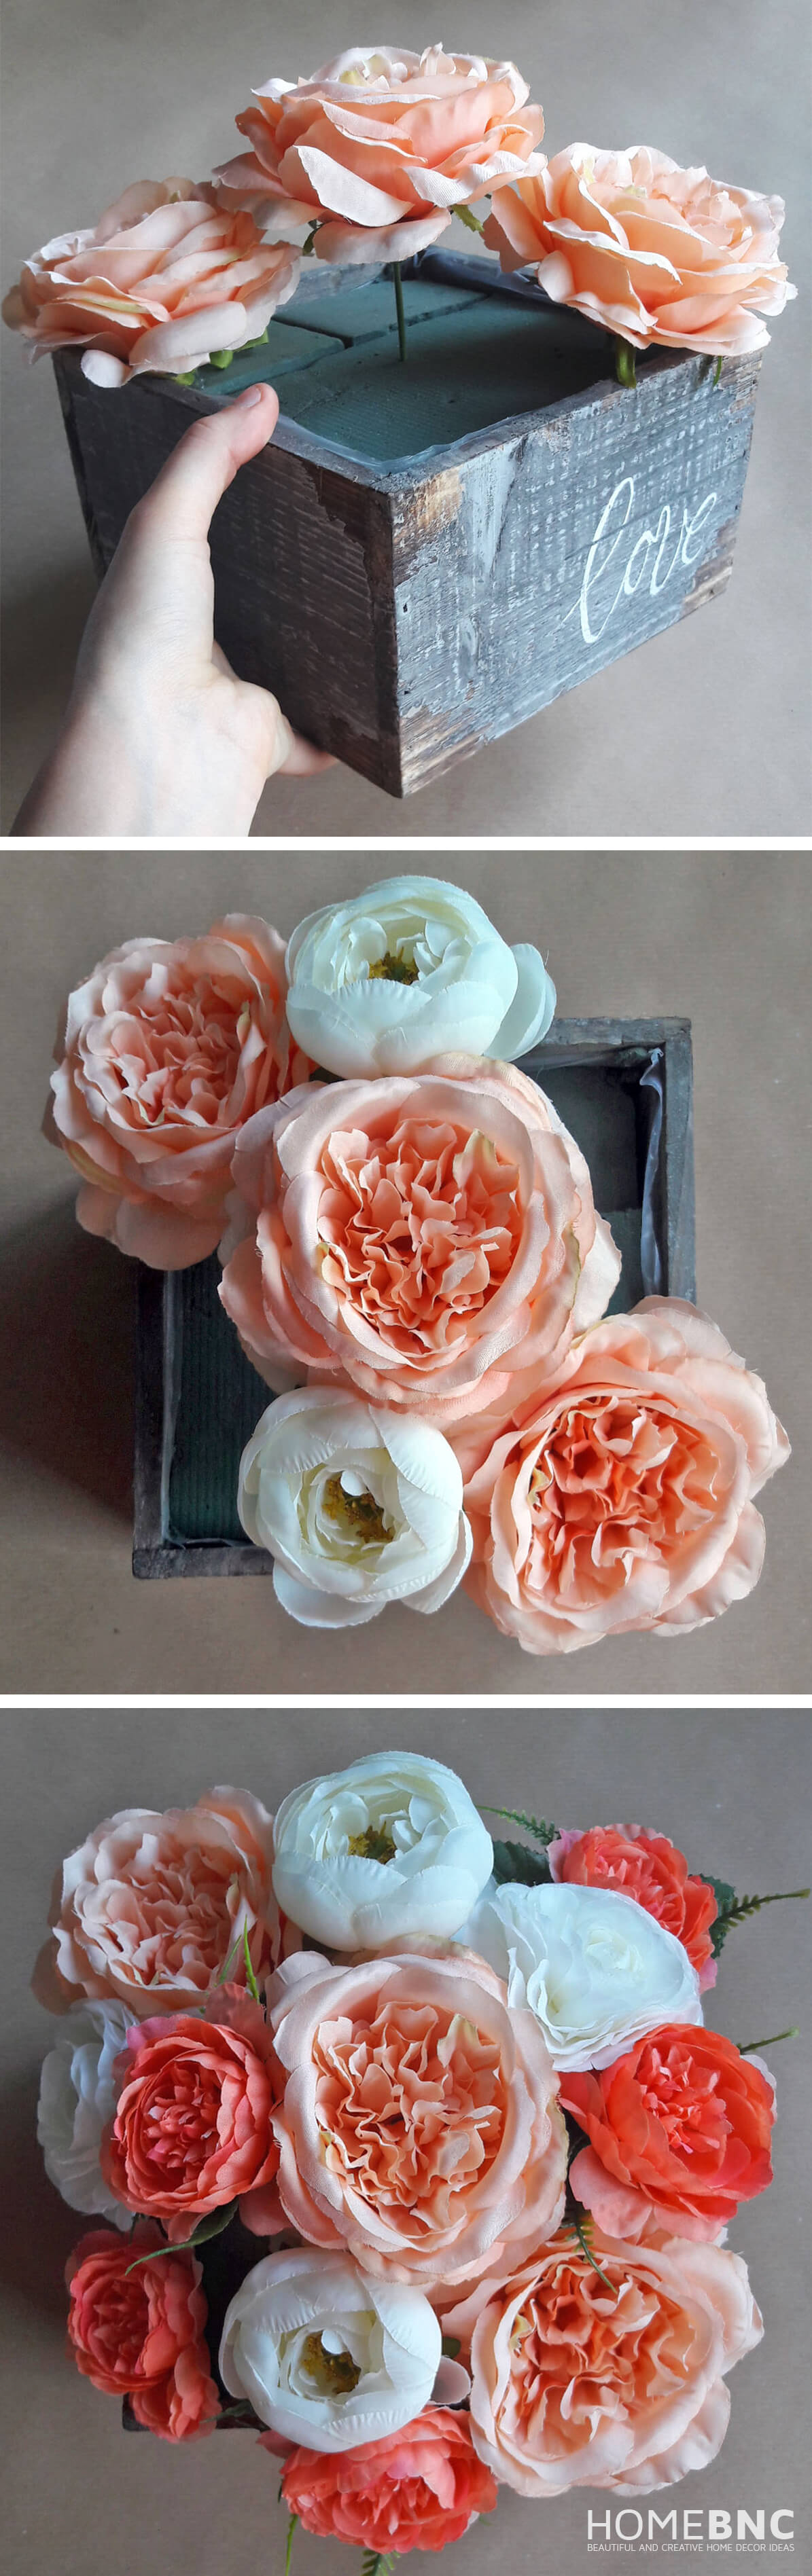
5. Finish with the Small Flowers
To finish off, fill the spaces with the remaining small-headed flowers, berries and greens to add some depth to the composition.

6. Find a Place for Your New Decoration
This stylish decoration will suit to whatever summer or autumn feast you can think of. In the picture it is used as a wedding decoration. Get inspired and have fun!